Nerd Techies | Learn & Share knowledge with nerds
To understand RLS (ROW LEVEL SECURITY) let’s understand the different problems first.
Problem 1 Suppose, you have a Multi-tenant e-commerce website and different companies registered on your website and you have centralized single database for all the client. Now as a product owner it is your responsibility that one tenant’s data should not be available to another tenant. This is a very common problem.
2. Now, Suppose you have hospital database in which you have login user of different doctors & nurses. Now, your challenge is to show data to doctor or nurses to their relevant patient to whom they are giving treatment, not any other patient data should be available .
Here, limiting the user’s access to only certain rows of the data in database many have various reasons like compliance standards, regulatory need or security reasons.
Now, I know you were thinking that all the above problem can be resolved at code side easily by writing custom logic. I will say here yes you are right but this is not the 100% solution. For example, if you have 4 different application like web, mobile, console, windows (Excel) and all has their own DAL then you have to implement this custom logic to every application and suppose tomorrow if any time a new 3rd party came which want to integrate your data or access database directly then in such cases it is tuff to apply same logic.
So, all the above problem can be easily handle using SQL SERVER 2016’s feature which is ROW Level Security (RLS). Security is one of the key areas which is handled in SQL SERVER 2016 very seriously. As RLS (Row Level Security) is centralized security logic so you don’t need to repeat same security logic again and again.
As the name suggested Security implemented at Row Level in SQL SERVER 2016. In the Row Level, Security data is access according to user roles. It is a centralized data access Logic.
RLS has following properties
- Fine-grained access role ( control both read & write access to specific rows)
- Application transparency ( No application changes required)
- Centralized the access within the database
- Easy to implement & maintain
How RLS works?
RLS is a predicate based function which runs seamlessly every time when a SQL is run on particular table on which RLS predicate function implemented.
There are 2 predicates which can be implemented in RLS
1) Filter Predicate: – By the name, it is clear that it will filter the row or we can say exclude the rows which do not satisfy the predicate and stop further option like select, Update & Delete.
for example: Suppose, you want to restrict doctor to see other doctor’s patient data then in such case you can apply filter predicate.
2) Block Predicate: – This predicate helps in implementing policy by which insert, update and delete rows will prevent which violate the filter predicate. In other words, we can say it explicitly block write operation.
For example, you have multi-tenant application and you want to restrict one tenant user to insert or update other tenant’s data. Or suppose you have sales representative who belongs to specific region so they can not insert , update or delete other region’s data.
Demo:-
I know you will be super excited to see the demo of this feature so. Let’s do it right away.
There are 2 basic steps to create RLS
a) Create inline table function or we can say predicate function and write custom logic to control user access to every row
b) create the security policy and apply it.
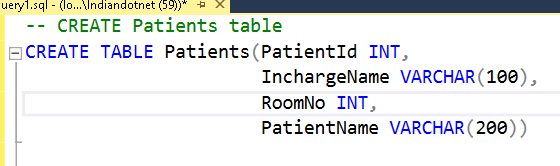
In this demo ,I am creating a new table called Patients which has following schema.
Here, I have inserted 2 rows for Nurse1 & 2 rows for Nurse2
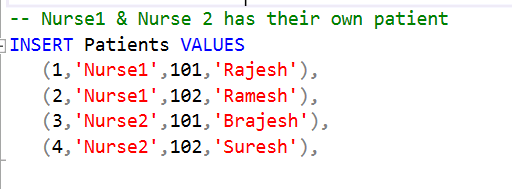
The objective is to show only those rows to Nurse1, Nurse2 in which they are the in charge and a doctor user can see entire table’s data.
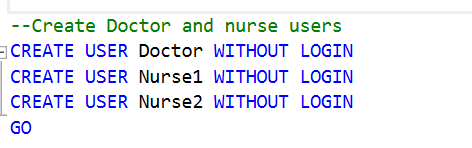
To achieve this let first create 3 users in database
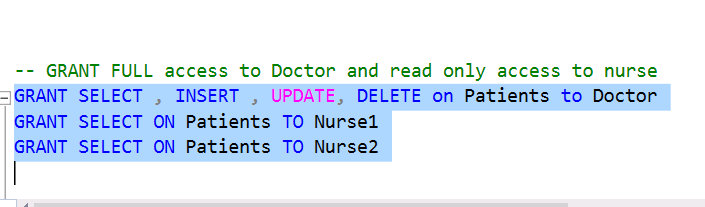
Once the users are created the next step is to grant permission of select to Nurse1 & Nurse2 user and full permission to doctor user.
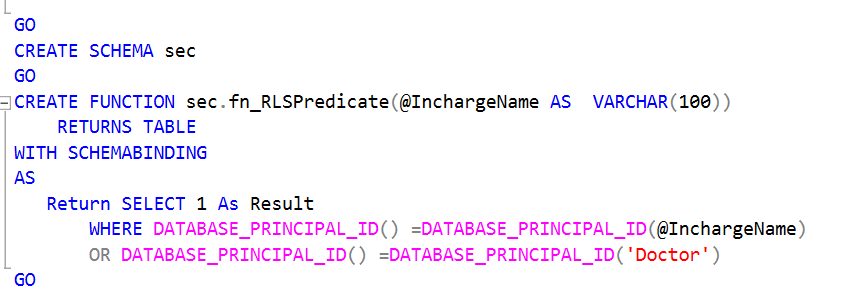
Now, before creating function it is a standard to create a security schema in our case we are creating a schema with name sec as shown in below figure.
Now, create a function which will have security logic. The Logic is very simple if the user is doctor Or any in charge name then return 1 else 0.
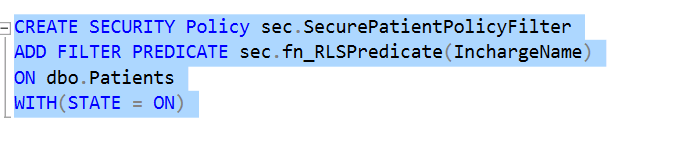
Now create a security policy to proceed further
Till now we are good to go. Now, let’s test the security policy.
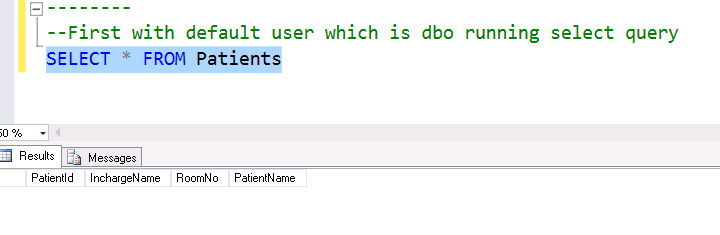
Firstly, running the select query with default user “dbo.” and we have not given permission for this user if you see fn_RLSPredicate we have not mentioned it so obviously the result would show “0” records.
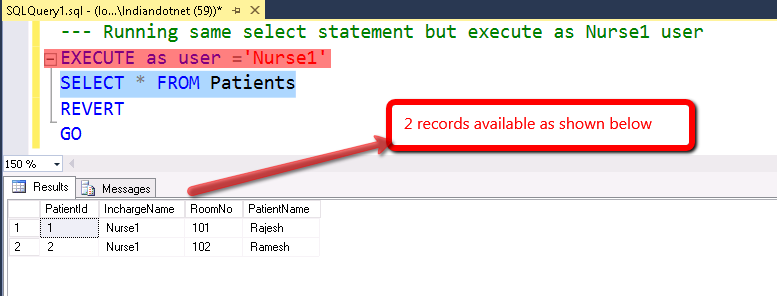
Now, running the same select statement but executing with “Nurse1” login then you will find 2 records which are relevant to Nurse1 is visible.
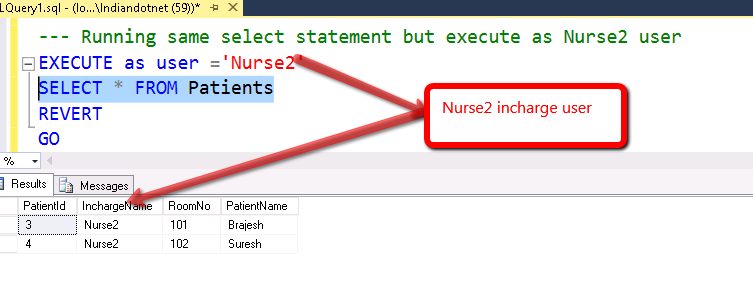
Similarly, I am running the same statement for Nurse2 user by running command “Execute as user” so, again I will get 2 records
Now, running the same statement with Doctor user and as per our expectation, it should show all 4 records.

So, as you can see we have achieved the goal using RLS (Row Level Security) feature. Now, next thing which might occur in your mind how to disable this policy if required then doesn’t worry it is very simple. Just alter the security policy and make state = off as shown in below figure.

I hope till now we are good to work on RLS. In next couple of post, we will dig deeper in RLS.
Please, share your thought for RLS.