Dear Friends,
In last post we have successfully created our fist basic package. So, Now the next thing is how to deploy this package.
We have created this package for someone else or our client so we need to run this package on his /her machine.
For this we need to know how to deploy. Lets start this step by step
Step 1:- Open the existing solution and right click on the solution you will get following options as shown in figure. You need to click on “Convert to Package Deployment Model” as highlighted below
Step 2:- Once you click it you might get popup for confirmation just click OK.
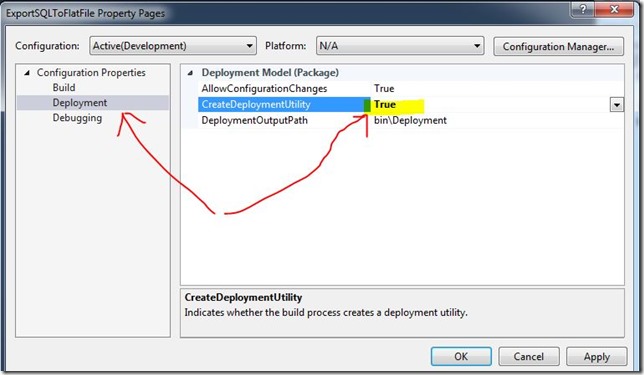
Step 3: Now click on Properties you will get following screen in which you need to select the deployment option. And need to select true value for CreateDeploymentUtility as highlighted below in figure. Once You make this option true press OK or Apply Button.
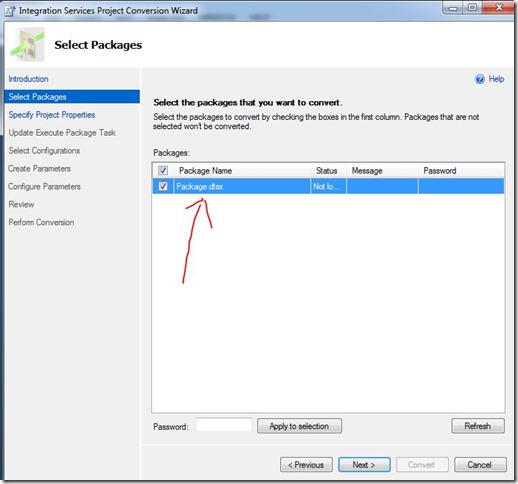
Step 4:- Once you done with this again right click on the solution and again click on Covert to Package deployment model. Now this time you will get Wizard screen as shown below. Click on Next button
Step 5:- You will get below screen which is package selection screen. (Suppose you have multiple packages in a solution so for which package you want to create deployment you need to check / Uncheck according to your need.) Once you selected the Package click on Next button.
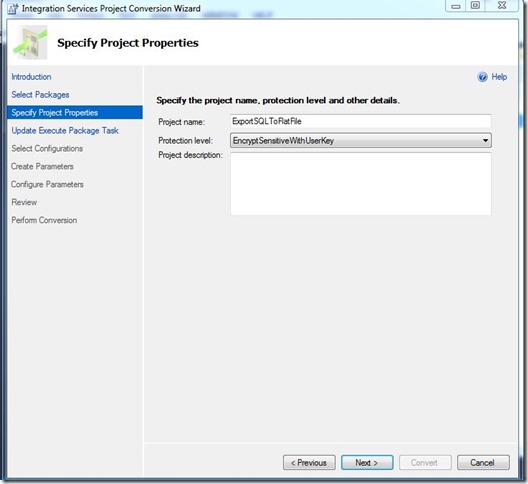
Step 6:- When you click next button you will get next option which is specific project properties as shown below in screen. In this we have an important option which is Protection level. It is use to set the level of showing sensitive data in package. for example a package may contain sql server connection string in which we have username and password and username and password are very important and sensitive information. Here ,with protection level we have option to encrypt this sensitive data or make package password protected. This will be an interesting topic which we will discuss separately in near future in separate post. for current time being just leave the default option as is and click on next button.
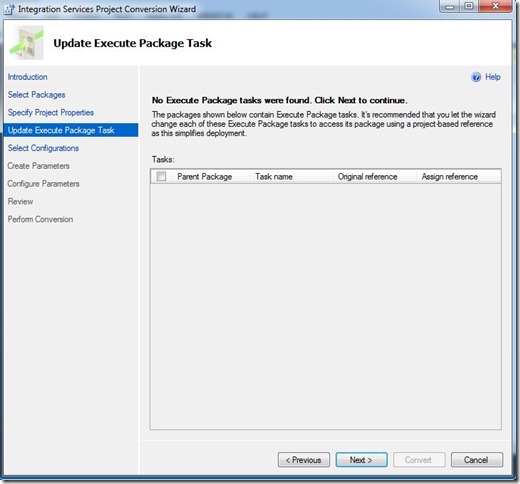
Step 7:- When you click on next button you will get following screen. This is the screen where you can call another package which this deployment. We will discuss it later for current deployment process we don’t want to call any other package. Just click on next button.
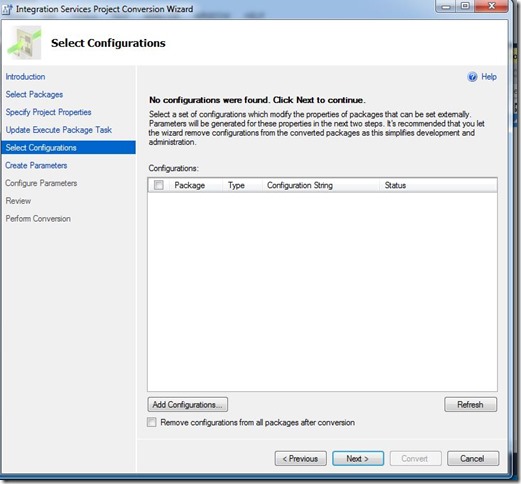
Step 8:- When you click on next button you will get following screen which says about configurations. We can create a configuration file which is just a simple XML file. If you are a .NET developer just assume it web.config file where we can keep connection string or other configurable item.
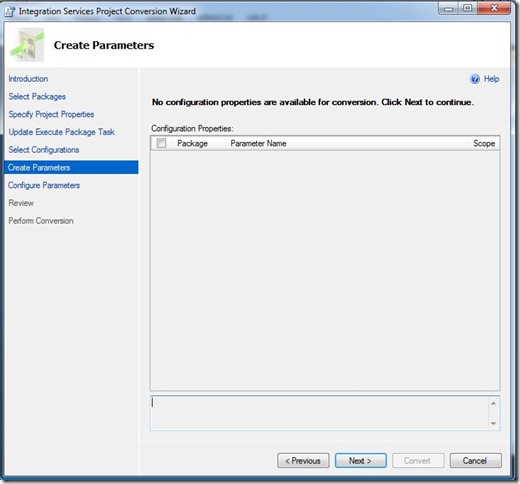
Step 9:- We can create parameters which can be use to pass the values in packages. In current solution we have not configured even parameters so don’t think to much about this currently. We will discuss it separately in coming post.
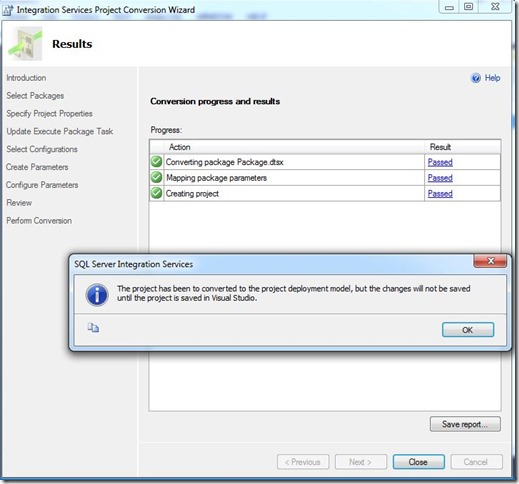
Step 10:- Now directly jump to Perform Conversion and skip review step. and click next you will get following screen of popup. Press OK and then try to rebuild the solution.
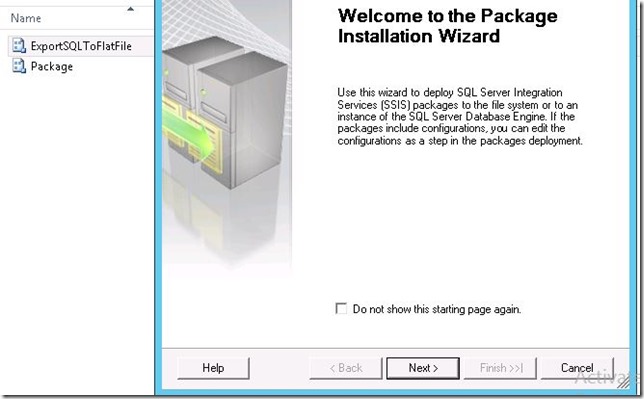
Step 11:- We did a build/rebuild to cross check package is correct. Now open the deployment folder in bin folder (You can find the address in step 3’s screen) . When you open the folder you will get two files one is Your package file with DTSX extension and another one which is called manifest file as shown in the figure below. Below ExportSQLToFlatFile is our manifest file and Package is our actual DTSX package file. (if we have config file then you will find config file as well)
Step 12:- Now, we successfully completed our first part of deployment which is basically creating a package deployment file which is a manifest file. We can copy these files on any server where we need to deploy the package. When you click on Manifest file which is ExportSQLToFlatFile you will get following screen
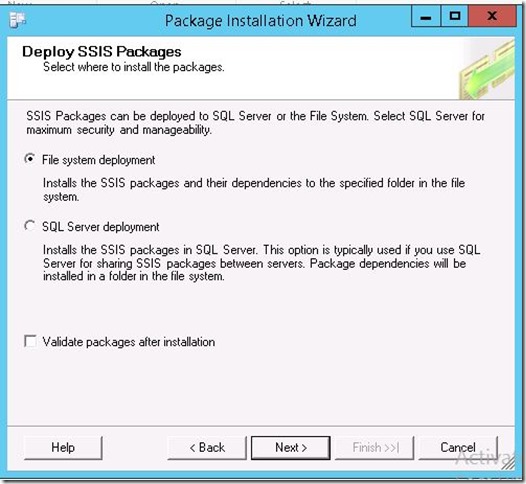
Step 13: Click on Next button when you get above screen you will get following screen which shows 2 options of package deployment
1) File System deployment 2) SQL Server deployment
Now for current demo we are using file system deployment and clicking next button.
Step 14:- When we click next button we get the screen which ask for folder where package will be deploy by default it is SQL SERVER’s DTS package folder so let it be currently and click Next button
Step 15:- After clicking next button , we will get following screen. Which is a confirmation screen for deployment.
Step 16:- Now the last step click the finish button and we are good to go.
So all the above steps are for creating a deployment for package and then deploy in SQL SERVER. Now , I am sure your next question will be what now ?
So, now we call this Package in SQL SERVER Job and configure job which execute this package time to time.
We, will discuss it more in detail coming post.
I hope you will like this post. please do post your inputs.
Thanks
Raj






Comments
Hello Raj,
Thanks for your post.
But when i follow the same process i am not able to see deployement folder in bin folder