In the previous post, we saw how can we test a windows application using Coded UI. In this post, I am trying to describe how we can do automation testing of a web application .
So, let’s start step by step for
Automation testing of a web application.
Although, I am showing Automation testing in this post but the project template is more than that. I will describe in future posts for load testing & web performance related concept as well using this great tool but In this post, we are just concentrating automation testing of a website.
Step1:- Open visual studio and add a new Project. This time, we are using “Web Performance and load test project” as shown in below screen. Although, this template is self-descriptive.
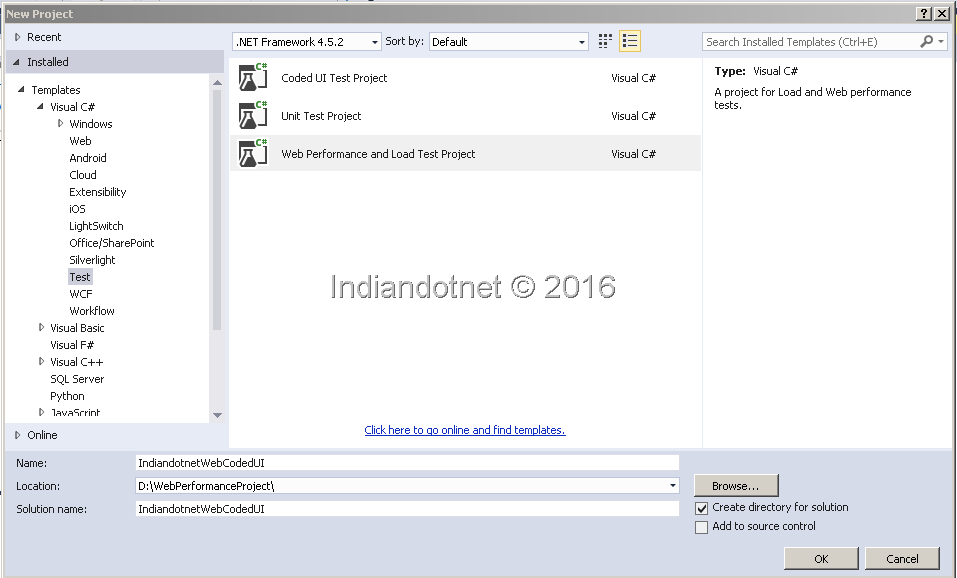
Step 2: – When you click on this you will get the following screen.

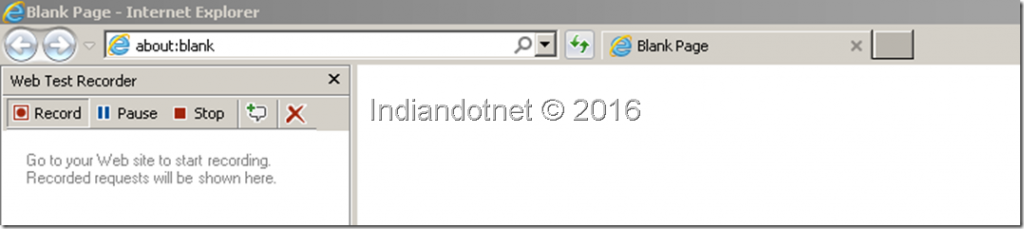
Step 3:- Here, if you saw above image you will notice we have to click on recorder button. When you click this button, you will find internet explorer screen with record, pause & stop options as shown in below figure.
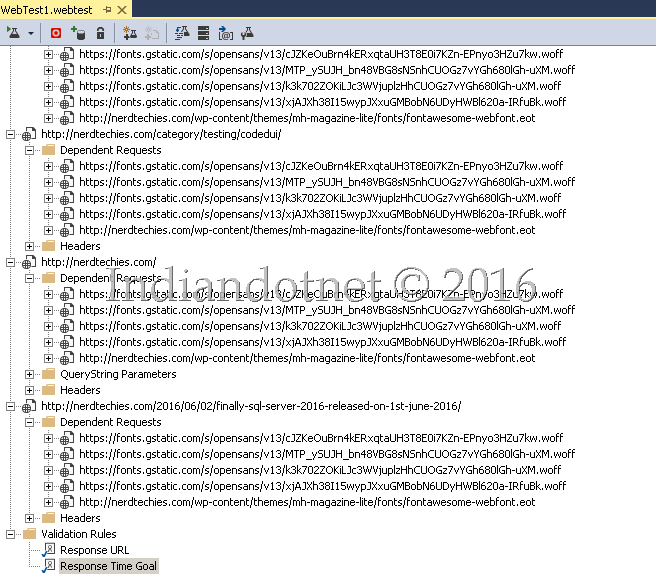
Step 4:- Here we have to provide the URL which we want to test. In this example, we are using http://nerdTechies.com and for a demo purpose, we are clicking on different menus and searching with the specific value. All our activities which we will perform will be recorded by the recorder and we can easily see those steps as well. As you can see in below figure.

Once we done with our basic test cases we have to press STOP button as shown in the above image. when we click STOP button our internet explorer browser will be close and we will get all the recorded action in our Visual Studio IDE as shown in below image.
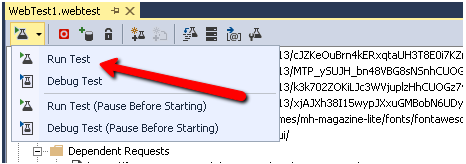
Step 5:- Now, in the next step we defiantly want to cross check all the action which we performed and recorded by the recorder in Internet Explorer. for this, we just need to click on Run Test button as shown in below figure.

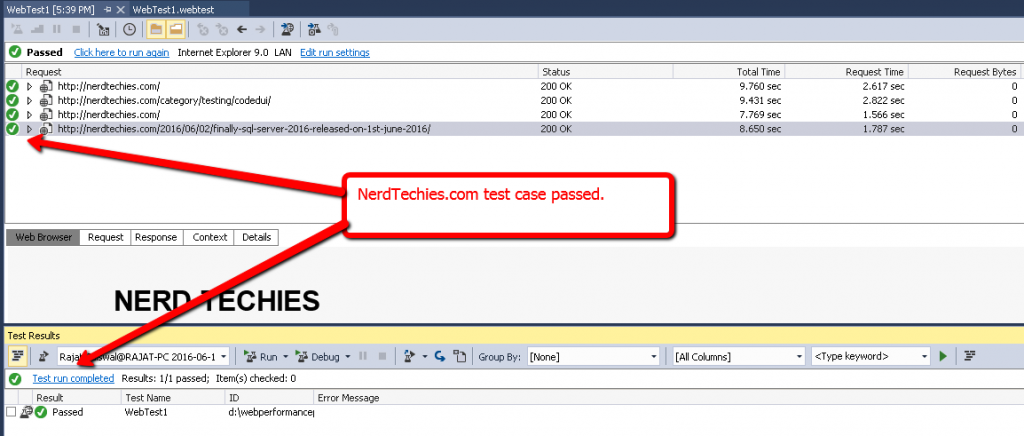
Step 6:- When we Click run test option the IDE run all the recorded steps in the same sequence and if everything as per the expected result it will display “Passed” status for that particular recorded test case as shown in below figure.
I hope you like this simple way of recording your test steps and cross check it again and again by just pressing Run test button.
Although, Just wanted to share as mentioned in the introduction of this post as well. This project can do much more this but for now , I am showing a small part of it.
I hope you will use it soon. I appreciate your inputs for this post.
Enjoy !!
RJ !!!

