Dear All,
In the series of zero to hero SSIS series this is one of the simplest transformation control which known as UNION ALL.
As you might aware UNION in general term which means collective. In SSIS UNION all control is doing the same task.
It collect all the inputs may be of same type of sources or different type of sources and union them all and provides single output for the same.
Lets understand this by below example.
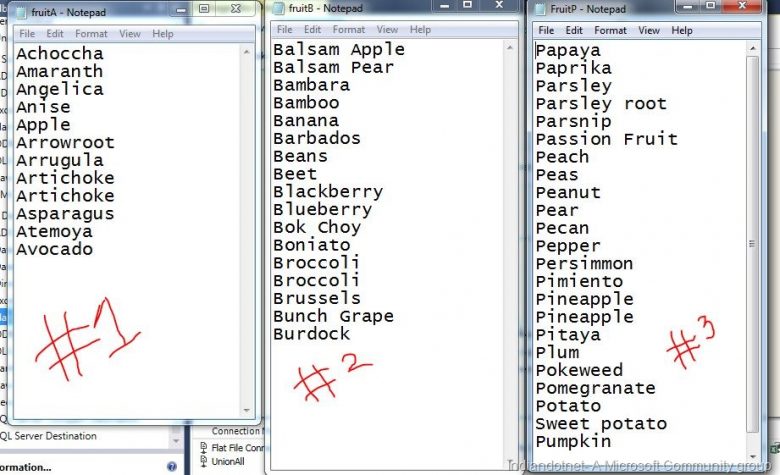
Suppose, We have different text files which contain fruits & vegetables name. Now our aim is to combine all the fruits and vegetables name which exists in these files.
if you see below image you will find 3 files which FruitA (Contains fruit names start with letter A) , FruitB (Contain fruit names start with letter B), FruitP (contains fruit name start with letter P)
 Now we need to combine this file using UNION ALL transformation. So follow below step by step
1) Step 1:- Step 1 is simplest step and now you all well versed in this. We need to add a new SSIS package file and drag drop data flow task .
2) Step 2:- Now add different flat file source for all the 3 files and configure all the 3 files fruitA.txt, fruitB.txt , fruitP.txt .
3) Once we configured all the 3 flat file sources, We have to drag drop UNION ALL transformation control.Once we drag drop UNION ALL we can provide the output of all the 3 files as a input in UNION ALL control as shown in below figure.

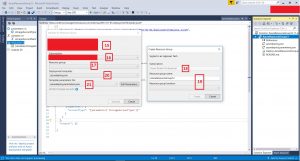
Step 4:- Now, we have to configure the UNION ALL control. To do this right click on UNION ALL control and click on EDIT option. Here we have to configure all the columns which we need to union.

Step 5:- Once the UNION ALL is configured our next step is to get the output of UNION ALL in a resultant file. for this we have to drag drop destination flat file control as shown in below figure.

Step 6:- Now we have to configure the flat file destination and save it to specific location. A part from this we have to provide input to flat file destination which will be output of UNION ALL control. As shown in below figure I am saving the file on same location and giving name finaloutput.txt

Step 7:- Once all the above step is processed by us the final step is to run the package for this just click on RUN icon or hit F5. If everything is working fine the we will get following result with all the green right check images.

If you see above image we did union of all the 3 files and saved output in a single file.
Now, for learning purpose and to make the post simplest I use only same type source you can use different type of source and destination as per your need.
A part from this UNION ALL doesn’t remove duplicate so if there are duplicates in the files it will not remove.
I hope this article will help you somewhere. Please provide your inputs.
Enjoy !!!
RJ!!!